Let Expert Laminate Flooring Contractors Help You Realize The Home Of Your Dreams

The ultimate guide to cleaning laminate floors

What are laminate floors?

A hybrid floor covering, laminate flooring is installed much like real hardwood – multiple boards joined with a tongue-and-groove system. Unlike hardwood flooring, however, a piece of laminate flooring is made up of multiple layers:

  • A wear layer of durable plastic that protects the layers below
  • A pattern layer that gives the floor its attractive appearance
  • A core layer (also called a substrate) made of high-density fiberboard (HDF) to give the floor its heft and shock absorbance
  • A balancing (or backing) layer that works as a moisture barrier and stable base.

Laminate flooring is a popular solution for those who want the aesthetic of hardwood or stone flooring without the exorbitant price tag.

The best way to clean wood laminate floors? Prevention!

The optimal way to keep your laminate floors clean is to stay on top of routine maintenance. Consistent once-over cleaning will keep them in much better condition than an occasional attempt at a deep scrub.
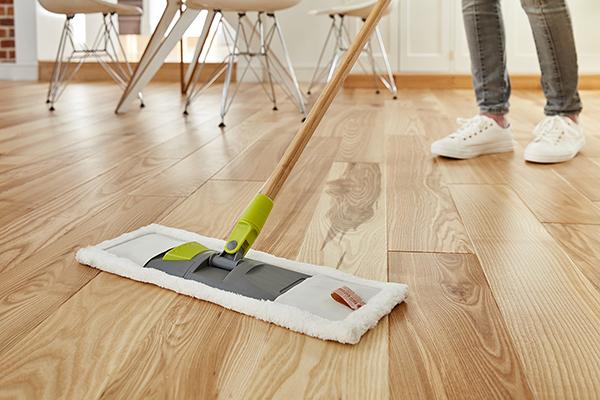
Sweep or vacuum

The simplest of all floor-cleaning routines. Dirt doesn’t just affect the look of your home, it also causes tiny scratches in laminate that build up to dull the surface of your floors. You should sweep or vacuum your laminate flooring at least once a week.

To ensure your broom or vacuum isn’t scratching your floors, employ the use of a soft dust mop and ensure your vacuum’s brush is in the ‘up’ setting.
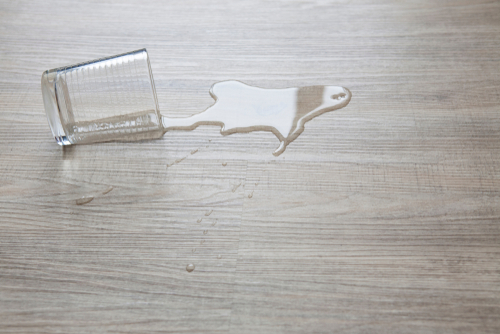
Wipe up spills ASAP

Laminate floors seem like they are totally waterproof, but they’re not. Liquids will seep in over time (think of those small leaks that can build up under fridges). The best advice is to clean up the spill and then use a completely dry cloth or paper towel to remove all dampness.

Wash with plain hot water

Hot water really is an effective cleaning agent for floors: it cuts grease, melts dirt and is lethal to microbes. As it contains no harsh chemicals, there is little chance of it damaging your floors. A monthly wash-down is usually sufficient if you’re also following a weekly sweeping routine.

As laminate floors are sensitive to water, it’s important though to wring your mop out until it is just damp, not wet, when you apply it to the floor.

Always use saucers under your houseplants

Water damage to laminate flooring can be catastrophic, so it’s important you prevent water exposure where possible. Houseplants should always sit in a saucer to catch any excess when watering or seepage through the pot.

Close the blinds during the harshest times of day

Sun bleaching of laminate floors is a tricky customer – often people don’t realise what’s happened until they move their furniture and find two-toned laminate. To help prevent sun damage, ensure you close your blinds against the sun during the harsh midday and early afternoon hours.

Apply furniture pads

Furniture pads are an oft-overlooked godsend when it comes to maintaining your laminate flooring. Without them, you risk scratches or even large gouges in your floor. So, do yourself a favour and spend the extra few dollars on preventative furniture pads. Your laminate floors will thank you.

Tips For Making Your Laminate Wood Flooring Last

If you’ve recently invested in new laminate wood flooring, you probably love it for its super-realistic wood look, its exceptional affordability and, of course, its low-maintenance appeal. We all know that no floors are zero-maintenance, and it takes a little bit of effort to ensure that they stay in play for as long as possible. Indeed, laminate floors are made of multiple wear layers that provide exceptional strength, but they are not indestructible. Understanding how to prevent damage and routinely cleaning and addressing accidents will translate to many years of quality use.

Here are a few simple ways to keep your laminate floors in fantastic condition, even if you’ve got a particularly busy home, complete with kids and pets

Rule No. 1: Keep It Cool and Dry

As a general rule, laminate and water do not mix, though there are new water-resistant laminate hardwood flooring options available which include our Palmetto Road Brunswick collection and Beauflor Hydrana collection. All laminate is made with layers of composite wood, which can become irreversibly damaged by buckling, warping, swelling and the growth of mold and mildew if exposed to excess moisture. Here are a few tips for keeping your floors dry:

  • Make sure to always wipe up spills immediately.
  • If it’s a humid day, run a dehumidifier or an air conditioner.
  • Keep the room at between 55 and 85 degrees Fahrenheit.
  • Always damp-mop your floors. Never saturate the laminate while cleaning.
  • Don’t let cleaner sit on the floor too long, even in small amounts.
  • If you have kids, only allow them to drink from spill-proof cups.

Rule No. 2: Prevention Is Essential

You know what they say—an ounce of prevention is worth a pound of cure! This is especially true as it pertains to floor care. The right protective products will help give your floor a layer of protection so that it’s shielded from scratches, dents, nicks and damage to the finish. Here are some ways to keep your laminate floors imperfection-free:

  • At entryways, cover floors with dense walk-off mats to prevent snow, rain, mud and dirt from damaging the floors.
  • Always use felt protectors on the bottom of furniture legs to put a layer of cushion between furniture and your floors, preventing surface damage.
  • Don’t let the floor come into contact with anything sharp! Keep your pets’ nails trimmed and avoid wearing pointy heels.
  • Avoid exposure to direct sunlight. Use blinds or curtains and cover floors with area rugs to keep it protected from UV damage.

Rule No. 3: Clean the Right Way

Low-maintenance doesn’t mean no cleaning ever, but it does mean laminate is a bit less fussy than other types of flooring, including some types of hardwood. It’s all about finding the right routine and the right balance. Make sure to set yourself up with a solid routine that’s easy to follow so you don’t miss any important steps.

  • Sweep or dust mop at least twice a week to remove any surface dirt and debris from sitting on the floor, which could damage the finish.
  • Vacuum the floor using the hard-surface floor setting at least once a week.
  • Clean with your recommended floor cleaner (noted in your floor’s care and maintenance documents) once a week or once every other week.
  • Occasionally clean with revitalization products to make floors shine like new.

Rule No. 4: If Necessary, Make Repairs

While laminate is made of composite wood layers, it’s not able to be sanded down and refinished like hardwood because the top is a wood-look print film product. However, that doesn’t mean that every time your floor is damaged you must immediately rip it out and start anew. Some issues can be addressed relatively easily with special products and techniques. The following tips will help you address any serious laminate damage.

  • Keep extra planks on hand. Remember, they can be swapped out on a one-for-one basis if damage is serious.
  • If damage is small, you may be able to address the problem with a floor filler product to negate the need for plank replacement.
  • Hairline scratches and minor imperfections may be concealed with a wax pencil.

Sealing Laminate Floors: The Pros and Cons

This quick list of pros and cons will help you decide whether you’d like to leave your installation as-is, or go forward with the task of applying sealant to laminate flooring.

Pros

  • The right sealant provides excellent spill protection.
  • When you seal laminate floor expansion spaces in kitchens and bathrooms, there’s less risk of subfloor damage in the event of a large spill or leak.
  • Sealant is inexpensive.
  • It’s easy to apply sealant to a laminate floor.

Cons

  • Some laminate flooring brands are not designed to be sealed.
  • Laminate floors can be slippery and dangerous when sealant is applied to the entire floor.
  • When sealant is applied to laminate flooring against manufacturer’s recommendations, the floor warranty may be voided.

The sealing process starts with the installation of the flooring. You should always use a PVA Type II glue when installing laminate flooring. This provides sealing for the space between planks. Always buy this adhesive in a bottle with a nozzle, as this allows you to regulate how much adhesive comes out. You don’t want it coming up between the seams, to the point where it is visible on the surface of your floor.

Never apply floor sealant over a floor that has been waxed; the sealant will not stick. If the floor has ever been waxed, the wax will need to be fully removed, before any sealant can be applied. Normal floor-stripper can be used to remove the wax. Just be sure to do a thorough job, as the wax might not come up with the first application of stripper.

How To Protect Laminate Flooring

Laminate flooring comes in many different materials. Some wood flooring is just hardwood lumber like oak, cherry, or maple milled to the proper dimensions. People also use softwoods like pine for flooring. There are laminates that are built up with an HDF center and waxed edges to resist moisture. HDF means high density fiberboard.

Regardless of what material your laminate flooring is made from, you still will want to protect that shiny finish from scratches, scuff marks, dents, and other damage made by furniture legs.

There are a number of different ways to protect your laminate flooring finish.

Cane tips

  • Cane tips are rubber cups that usually are applied to the ends of canes. They come in several sizes that you can find in most hardware stores and home centers. Just buy the size that fits your chairs’ legs and push them into place.

Felt discs

  • They have an adhesive on one side that sticks them to the bottom of furniture pieces. They work best on pieces that do not bear much weight. They do compress and they will wear out so they will need to be changed periodically.

Plastic discs

  • Different shaped plastic discs come with a pad on one side. Some discs have adhesive on the pad so it will stick to the furniture feet. Other discs simply sit under the furniture foot and a small rim holds the pad in place. The hard plastic bottom will allow the furniture to slide around on the floor without damaging it.
  • These work best under heavy pieces of furniture like sofas, couches, pianos, overstuffed chairs and recliners.

Carpet pieces

  • Small pieces of carpet work well to protect laminate flooring surfaces but they can be difficult to match to the floor finish and the edges tend to fray over time.
  • They are best used where they are hidden under the furniture.

Clear soft rubber pads

  • Clear soft rubber pads like carpet runners are a good choice when you want to see the floor surface. They do not slide around and are silent while you are sitting on the furniture.

Tips

Be careful when choosing the type of flooring protectors you want to use. Take issues like tripping or moving the furniture into consideration as well as design criteria like shape and color.

Use your imagination and try out different materials like thin pieces of high quality plywood, or heavy upholstery fabrics. The choices are almost endless. For those who like to reorganize, moving furniture around the house, or tackling that spring-cleaning project, furniture protectors are the perfect choice to help maintain that like new finish on your laminate floors. Choose the type of protector that best suits your taste, your needs, and your furniture and enjoy that long-lasting laminate floor shine.

Restore The Shine On Your Laminate Floor

As laminate flooring gathers dirt over time it will lose its original shine. Instead of leaving the floor looking dull and dirty, homeowners should spend a little time and effort to restore the shine on their laminate flooring.

Dirt can be easily cleaned away by vacuuming or sweeping. Hard debris and small rocks should be cleaned away gently as they can scratch the laminate surface. After the dust and debris are removed, use a cloth-strip mop to mop the floor. Many homeowners use cleaning products when they mop their laminate floors, but most of the time, using water is good enough. Put some vinegar in the water to prevent water spots from forming. Squeeze out as much water as possible when mopping, so that the floor can dry more quickly.

If cleaning and mopping do not put the shine back on your laminate floor, it is likely that the floor is coated with residue. Residue can accumulate over time from a build up of cleaning products and is more difficult to remove than the usual dirt and debris. To remove residue without damaging the laminate flooring, put some vinegar on a clean cloth and wipe a small part of the floor. Keep wiping until a shiny spot is revealed under the residue. Then continue to work on the rest of the floor until it becomes shiny again.

Some laminate floors are dull because they are old, and not much can be done to put the shine back on them. If removing the residue fails to make the laminate floor shine again, then the surface of the floor is probably worn out. In this case, a floor shiner can be used to recreate the original look. Applying a coat or two of floor polish can also be effective in reviving the shine.

Do It Yourself Wedding Videographer

Questions To Ask Your Wedding Videographer

When hiring a wedding videographer it’s a good idea to have some questions in your head before opening up discussions. The person that you hire will capture the most special parts of your day, like you walking down the aisle, so it’s important that you feel comfortable with them. These questions can also give you an idea on how to envision what you want from your videographer, making the process of finalising your choice that much easier.

Are you available on my wedding date?

This is perhaps the most important question of all and the one you’ll need to ask first. Many popular wedding videographers will have their diaries booked up months, if not years in advance, so you should try and book as far ahead as possible.

Are you able to travel to my location, and do you have any travel expenses?

Once you’ve confirmed that your date is available, you’ll have to check your venue is a feasible distance for the videographer to travel. You could also ask where they’re based or travelling from, to get a general idea of how far they’re having to come and if they’ll need to add hotel stays to their travel expenses.

How long have you been filming weddings? How many do you do each year?

Getting a general feel for the videographer’s experience filming weddings is a good way to compare them with other vendors, as this might also affect how much the wedding videography costs. If they’re booked out months in advance, then that’s a good sign that they’re doing something right!

How would you describe your videography style?

Each wedding videographer will have their own unique style that they bring to their work, so it’s worth asking them about it. Perhaps they specialise in documentary, candid style videography, whereas you’re looking for a more cinematic approach.

How Long Has Your Videographer’s Company Been In Business?

This clues you in to the quality of the company and the longevity of their commitment to service.You will want a wedding videography company that has been around for at least five years! Make sure to add this to your list of wedding videographer questions!

How will your videographer coordinate with a wedding photographer?

This is a huge necessity. Booking both services with the same company is a great idea. There will be unity in their work ethic and style.

Has your videographer shot a wedding at your ceremony or reception site?

If he or she has, the wedding videographer will have a knowledge that you can benefit from such as knowing the lay of the land.

Is your aesthetic light and airy, dark and moody, or something in between?

This should be something you’re able to gauge based on the sample videos on their website, but they might not have just one style. Be sure you know their process so there are no surprises if you were expecting a certain aesthetic.

Are you licensed and insured?

Of all the questions to ask your wedding videographer, this one may be the most important. Most venues require a liability insurance policy from wedding vendors.  You want to be sure if any accidents occur that all parties are protected and covered for damage and/or injury.  If the videographer is filming with a drone, make sure they have it FAA registered and have a Part 107 license.

Do you have a second shooter?

Unless you have a small and short elopement, you really need more than one videographer. There are far too many things going on at once to risk not capturing something important. Two videographers means they can be at two places simultaneously. For example, one can get bridal shots while the other gets groom shots. They can also get more angles of your ceremony and reception. If one of the videographers has their shot blocked by a guest or they’re busy adjusting a light or audio, the other can pick up the slack. Having a second shooter is important both for security, as well as creativity.

How long do you keep our footage after the wedding?

If your budget is running tight towards the wedding day, it’s nice to know if your vendor will offer extra footage after your day has come and gone. We keep each clients footage for 6 months after their wedding! If you decide you want raw footage or extra parts from your day, we keep that as an option!

I Will we meet before the wedding day?

We believe it’s very important to get to know each other before the big day! Meeting your vendor ahead of time can alleviate any awkwardness you may have in front of the camera. We love to meet our clients over coffee and even become friends before their wedding day arrives!

Have you shoot at my ceremony or reception before?

As a professional wedding videographer, I am proud to say I have shot wedding ceremonies the majority Wedding Venues in Melbourne. You might say OK except for you gonna charge me more now, what’s it gonna do with me? If your videographer has previous experience at your wedding venue, he will be more confident during your wedding as more things will be under controlled. Also, he will know what place is beautiful for shots and what place isn’t worth going.

What input do you want from us?

To produce a great film isn’t all about having the best cameraman, the actors matter too. In this case, you and you loved ones are the actors. To achieve the best video you will like, communication is the key. Talk With Your Videographer on what style you want to achieve and he will provide your advice from a professional point of view.

Now Is The Time To Prepare For A Local Moving Company Job

Moving house guide – the essentials

A smooth and stress-free move ultimately comes down to a bit of forward thinking and organisation, though it’s easier said than done. As you prepare to move house, you’re faced with a seemingly endless to-do list and some of the basics are bound to slip your mind.

Collect packing boxes

Moving can be costly, but there are plenty of ways to keep moving costs down and that starts with packing boxes. Save money on buying packing boxes and instead take regular trips down to your local shops leading up to your move. You’ll find most supermarkets and local stores are more than happy to get rid of their unwanted boxes.

Organise a removalist (or enlist the help of your mates)

Hiring a professional removalist service can definitely relieve some stress on moving day, but it’s an added cost you’ll need to consider. If you’re trying to keep to a budget, think about whether you really need a removalist. Ask yourself:

Can you enlist the help of friends and family for the move?

Will you be able to transport large pieces of furniture?

Will you need to hire a truck?

Are you under time constraints for the move?

Organise a skip and cull, cull, cull

When you start going through your things, you’ll probably realise just how much stuff you have, and there’s no better time to get rid of things you no longer need than when you’re thinking about packing. You’ll find when you’re sorting through what to keep and what to let go of, a lot it’s rubbish. It might be worthwhile organising a skip so it’s out of the way and you can focus on packing.

Organise a place for your furry friends to stay during the move

Moving house with a cat or dog? Moving can be really stressful for animals too. If you’ve got a pet, ask friends or family that are already familiar with your pet if they can look after them for a couple of days during the move. Once you’ve found a place for them to stay, visit them with your pet in the lead up to your move so your furry friend can get used to the people and the place they’ll be staying in.

Moving Guide

would like to help make your move less stressful by providing you with moving suggestions and tips. Organizing and preparing weeks ahead of your move ensures a successful re-location and dramatically reduces mistakes and stress.

6-8 Weeks Before Moving – Clean Out, Hire Movers and Pay Attention to Detail

Begin choosing which items will be moving with you, which will be placed in storage and which you can do without! Also consider which items you would like to move yourself, and which can be trusted with the movers. If you don’t have a moving company in mind, get references and take bids from several different companies. Check your local listings such as Yelp! and Google for local moving companies.

Many moving expenses are tax-deductible, so maintain a file with important information and receipts for moving related expenses. If moving to a new community, find out about the schools, parks, recreation, and community programs from the local Chamber of Commerce or Visitor’s Bureau. Transfer medical, property, fire and auto insurance through your insurance agent.

4-5 Weeks Before Moving – Gather Supplies, Register Community Changes and Set Up Utilities

If you are planning to do some part of the packing, start collecting moving and packing supplies. These can be purchased from our supply shop. Contact the post office and fill out a US postal change of address form and provide your new address to your utility companies, internet, phone and cable companies. If you have children, ensure they are registered at their new schools or find a trusted daycare provider in your new community.

2-4 Weeks Before Moving – Begin Packing and Disposing Items

You may NOT want to pack your valuables in the moving vehicle; consider taking them with you. Plants – some state laws do not allow moving house plants across borders so prepare for this ahead of time. Depending on the length of your move, if you are going to travel by car, you may want to get the automobile serviced prior to your departure.

Sign up for The Local’s Moving

which gives you an insight into all stages of the process, from house-hunting to registering yourself within the system and making friends with your neighbours.

We look at the pre-move admin such as arranging visas for certain nationalities and offering tips on how to navigate the property market to buy or rent your dream home. Once you’re here there’s a lot of that famous

There’s also the chance to benefit from the experiences of others. The Local has a large community of readers who have been through the process of moving and are always happy to share their experience, from the practical details to the culture shocks you should prepare yourself for.

Moving Guide

The hard part is over—you’ve found a new apartment or home that meets every standard. Only now, you need to turn it into a home. After all the stress of meeting with realtors and touring locations, the last thing you want to worry about is how to move your belongings from the past into the future.

Moving can be even more difficult than finding a new place to call home. Whether moving from one apartment to another, or into your new house, there are obstacles that can make the process feel overwhelming. Doing the move yourself may seem like a good idea at first glance, but working with experienced movers can preempt any challenges that may come up, and allow you to gain control of your time on moving day.

How to Effectively Organize Your Inventory

An Organization may not be one of your strong suits, but when it comes to moving, organizing will save you a lot of time and perhaps a fight or two with your roommate or significant other.

You should start packing by choosing items that can easily be replaced in your new home to save space. These items may include cleaning supplies, expired food, toiletries, and broken items.

Creating Comprehensive To-Do and Inventory Lists

To-Do List

Choose a moving company

Make an inventory list (Example provided below)

Buy boxes and bubble wrap

Decide when to start packing (or plan to have pack for you)

Make sure to pack your mattress in a box to avoid dirt / damages

Create a Moving Binder (holds all records, receipts, and documents related to your move)

Once you’ve signed your contract it’s a good idea to xerox all moving documents. Keep the original copy in a safe and secure place but take the xeroxes with you on a moving day.

Decide the best way of bringing any pets to a new home

Inventory List Example

Color code lists and boxes (create one list / color per room)

Pack smaller items into larger ones and take note of where everything goes

a. Suitcases are especially useful for this

Label all your boxes

a. Boxes should include your name and address (in case boxes are misplaced)

Make it easier to find items by labeling boxes with words like “tools”, “toys”, “electronics”

Local Moving Guide

Planning a local move within 100 miles? Move provides local moving and packing services and is the ideal choice for you moving needs. Move takes pride in providing quality moving and packing services at fair and affordable pricing. Our staff is trained and experienced in fulfilling all of your moving and packing needs. Moving can be stressful regardless of the distance and Move takes the time to understand and meet you moving needs.

Move provides quality local moving services and goes above and beyond to ensure that you have an exceptional moving experience. Move prides itself on quality customer care, fair and honest pricing and exceptional moving services.

To help with the convenience of your move Move can provide moving boxes and moving supplies needed for your move. Proper packing is essential to protecting your belongings and we want to ensure that all of your belongings arrive at your new home or business safely.

Types Of Divorce Lawyers And Skills Required

Questions to Ask Your Divorce Attorney in the Initial Interview

If you are contemplating a divorce, you may be shopping around to find a divorce lawyer to represent you. At the initial consultation, there are several important questions that you should ask.

1. How long have you been practicing, and what percentage of your practice is devoted to family law?

It is important to have an attorney who is experienced in family law.  In this era of specialization, it is impossible to do everything well.

2. Do you prefer to negotiate and settle, and what is your attitude toward mediation?

You will be best served by an attorney who is looking for ways to solve problems, not to escalate disagreements. An attorney who is willing to try all avenues to resolve your case can help make your divorce less costly, both financially and emotionally.

3. Who will be working on my case, and how involved will you be personally?

A good family law attorney often has a team to help him or her, which is great, but it is important for you to know who will be working on your case, who will be communicating with you, who will be in charge, and how you will be billed for that work.

4. How much is your retainer, and how does it work?

Find out how much the retainer is, and what it will cover. If you reconcile or change attorneys, will the unused portion of your retainer be refunded to you? Will there be additional retainers be required when the initial retainer is depleted?

5. What are your hourly rates, and how will I be billed?

Attorneys and staff bill at different hourly rates, and most attorneys charge their hourly rates against the retainer. Some attorneys bill in quarter-hour increments, and some in 6-minute increments. Some bill for each phone call, email or letter, with a minimum charge. Sometimes attorneys charge a higher rate for going to court. Ask how often you can expect to receive an itemized billing.

6. How long should my divorce take, and what do you estimate it will cost?

Don’t be surprised if the attorney doesn’t have a straight-forward answer for this one, since how long it takes and the cost depends on how cooperative each side is as well the complexities of the case. If there’s a custody battle or complicated business and property issues, a divorce can take a year or longer.

7. If you are unavailable when I call or if I send you an email, how long should I have to wait for a response?

Communication between you and your attorney is critical, and it is frustrating to wait for an attorney to respond. A good attorney will answer emails and phone calls within 24 hours, and may have someone on staff who can respond earlier.

Questions to ask a divorce lawyer at your first consultation

What should you be asking a divorce attorney at an initial consult? Below are three questions that you should ask of any divorce attorney that you are considering.

1. How long have you been practicing divorce law?

There is no substitute for experience.

Knowing the judges, the local rules, and opposing lawyers is very beneficial. Having actual trial experience is also invaluable for a divorce lawyer, as is experience in drafting and negotiating Separation Agreements, Pleadings, and Court Orders.

Learning to actually practice law (as opposed to just knowing the law) is to some extent, trial and error and a process of learning how to be a good lawyer. This is not to say that you should not consider a new attorney. Recent law school graduates often bring energy, strong knowledge of the law and recent technology, and are generally less expensive than experienced attorneys. It’s just riskier.

Whatever the case, you should know how long your attorney has been practicing divorce law before you hire them.

2. How many cases of this type have you taken to trial?

It’s one thing to have “handled” divorce cases, and quite another to have actually taken cases to trial.

Most cases settle, and better attorneys in my opinion are good at settling cases so court is not necessary. Some attorneys, however, are hesitant to take any case to trial.

While you may be confident your case will settle, it is wise to consider a divorce lawyer who has a good balance of trial experience while remaining an advocate of negotiation. You do not want a divorce attorney who takes every case to court because it demonstrates that they may be unreasonable, may not know the law, or might be too interested in collecting legal fees. However, having taken cases to trial indicates your attorney is knowledgeable about the law in theory and practice as you cannot “fake” your way through family law in a court.

3. What is the best way to achieve my goals?

What you are asking for here is a road map.

Good divorce lawyers with experience will have a road map or process that they generally follow in divorce cases. Some cases require a simple separation agreement and property settlement, however, you need to discuss all possibilities.

In my divorce practice, depending on the case and the goals of our client, we explain the step by step process of information gathering, negotiation, litigation (if necessary), post-filing negotiation, and trial preparation and execution (if necessary).

Based upon our early discussions and the situation of our client, we either gear a case towards early settlement (which has certain options) or litigation (high conflict matters) where settlement negotiations will begin only after the initiation of litigation. In some cases, it is necessary to file lawsuits first to even the playing field or seek immediate court intervention (emergency orders or restraining orders) to address custody problems or deal with a spouse who is not playing fair with marital money or assets.

In any case, your attorney should have a fairly clear and articulate process they follow to get from point A (where you are now) to point B (where you want to be). Do not expect a “how to” with great detail as that is not possible in an initial consultation, however it is wise to just listen and trust your instincts.

Availability:

Are you readily available to take phone calls in case of an emergency? What do you consider to be an emergency?

Individuals Involved in Your Case:

Will any other lawyers be working on my case? What is their experience? Can I meet them ahead of time?

Fee Structure:

What is your fee structure? Will you be charging an hourly rate or a fixed fee? What is your hourly rate?  What do you require for a retainer? What is the rate for the time I spend with other legal professionals in your office? Will I be charged for phone calls?

Questions to Ask Your Divorce Lawyer

Making the decision to file for divorce is never easy. We understand how daunting it can feel to have to approach a divorce lawyer to discuss formally ending your marriage. It’s important to note these questions and the information provided are just a general guide and do not constitute legal advice.

1. Will my divorce case have to go through the courts?

The thought of having to go to court on top of everything else you’re going through may seem like just too much. If issues can be resolved amicably between the parties, there’s usually no need for you to go to court although there may still be court proceedings.

2. As a mother, will I automatically get custody of my children? / As a father will my ex automatically get full custody of our children?

When there are children involved in a divorce, this is an important question to ask in order to put your mind at rest. There is not hard and fast rule, the best interests of the children will always be the paramount consideration for the court.

3. Do I have to get divorced in the same country we got married in?

Depending on your circumstances you may be eligible to file for divorce in a country other than the one you got married in. It’s important to note that divorce law differs between countries so your decision could affect your settlement.

4. What are your rates for working on divorce cases?

While cost shouldn’t be the overall deciding factor when choosing a divorce lawyer, it is important for you to get an idea of likely costs in advance so you can budget accordingly.

5. How will I be charged for your services?

It’s also important to know how you will be billed by your divorce lawyer. Will you only have to pay at the end of your case or be invoiced monthly for any work carried out? Or will you have to pay up front?

Questions To Ask An Divorce Attorney About Their Experience

1. How many divorce cases have you handled?

2. How many of those cases were you able to settle out of court?

3. Do you practice collaborative divorce?

4. Are you familiar with local family court judges and how they rule?

5. Do you believe it is better to mediate and negotiate than go to trial?

6. Do you have experience negotiating child support, spousal support, large financial settlements, or business valuation? (Be specific about issues you feel will come up during your divorce.)

7. Will you or another attorney from the firm be handling my case?

Posted inLegal

Counterfeit Air Circuit Breakers Coils

Motor Protection Circuit Breakers (MPCB) and Motor Circuit Protector (MCP)

Motor Protection Circuit Breakers (MPCB)

This type of circuit breaker includes both overload protection (thermal or electronic) and fault protection (magnetic). The trip characteristics of an MPCB are specifically designed for the protection of motors, allowing the inrush current but preventing any over-current condition that exceeds it.

Motor Circuit Protector (MCP)

MCPs only offer magnetic protection against fault currents, and therefore their trip is instantaneous. To provide overload protection, it is necessary to complement them with an overload relay and a contactor.

The main advantage of MCPs is that their trip response can be fine-tuned according to the expected inrush current, which may vary according to the type of motor starter used

MPCB/MCP Providers

Allen-Bradley

Eaton

GE

Understanding Circuit Breaker Specifications

Circuit breakers come with a list of several specifications, and understanding them is vital in order to select the proper breaker for each application. The technical specifications most commonly found in miniature (MCB) and molded-case (MCCB) circuit breakers are the following

Rated Operational Voltage (Ue)

Self-Explanatory: The operating voltage which the circuit breaker is designed. A single breaker may be rated for several voltages, or may be compatible with both AC and DC voltages.

Rated Insulation Voltage (Ui)

This is the voltage at which the circuit breaker is tested under laboratory conditions. For safety reasons, this value is always higher than the rated voltage.

Rated Impulse-Withstand Voltage (Uimp)

Maximum peak voltage the circuit breaker can withstand without being damaged. The Uimp often has a value of several thousand volts.

Rated Current (In)

Maximum current the circuit breaker allows without tripping. Anything above this value will eventually cause it to trip. Low overcurrent levels trip the thermal protection in a few minutes, while drastic peaks in current (line fault, short circuit) cause an instant trip.

Service breaking capacity (Ics)

This is the largest fault current the circuit breaker can interrupt without suffering damage.

Ultimate breaking capacity (Icu)

Maximum fault current that the circuit breaker can interrupt. However, the unit is damaged permanently for all fault currents above the service breaking capacity.

Mechanical Life

Average number of times the circuit breaker handle can be operated manually before failure.

Electrical Life

Average number of times the circuit breaker can trip before failure.

Reasons Why Circuit Breakers Trip

Circuit breakers that trip frequently may seem like a nuisance, but it actually means they are doing their job properly – cutting off the electric supply when excessive current is detected. Most modern circuit breakers have two independent tripping mechanisms, and each is designed to respond to a different type of fault.

The thermal tripping mechanism disconnects the circuit breaker when its rated current is exceeded for a predetermined period of time. This tripping mechanism allows for short-duration overcurrent conditions, which are common in some applications; for example, electric motors may draw 5 to 8 times their rated current when they start, but only for a very short time.

On the other hand, the magnetic tripping mechanism has an instant response and is designed to clear high-current faults such as short circuits or ground faults. When these faults occur, they are always an issue and must be cleared as soon as possible. When you see circuit breakers labeled as type B, C or D, the letters indicate the threshold at which the magnetic tripping mechanism is activated.

A type B circuit breaker trips at 3 to 5 times rated current.

A type C circuit breaker trips at 5 to 10 times rated current.

A type D circuit breaker trips at 10 to 20 times rated current.

Thus, if a circuit breaker trips, there are two main possibilities: either a fault has occurred, or the circuit breaker is not adequate for the application at hand. This article will provide an overview of the main reasons why circuit breakers trip.

Electrical Circuit Overload – Top Reason Why Circuit Breakers Trip

Electrical Circuit Overload

Basically, an overload occurs when the current through a circuit breaker exceeds it rated value for longer than what is normal for the application, causing it to trip. For instance, if a 20-amp breaker experiences a current of 25 amps, it will likely trip in less than one minute. You can conclude that the breaker is tripping due to an overload when disconnection does not occur instantaneously (the thermal mechanism is acting, not the magnetic one)

When this happens, the solution may vary depending on specific conditions:

Check the rated current of the devices connected to the circuit breaker. If they are operating normally and the breaker is still being tripped, it was sized too small.

On the other hand, if any of the devices is drawing an abnormally high current, the issue lies in the device itself and not necessarily the circuit breaker.

Keep in mind that both situations may occur simultaneously: maybe one of the devices connected to the breaker panel is drawing a higher current than normal, but the breaker still trips even after the issue was fixed. Therefore, it is best to always start by checking the current being drawn by the appliances connected to circuit breakers.

SquareD Miniature Circuit Breaker (QO/QOB) Terminology

SquareD by Schneider Electric is one of the top brands of circuit breakers in the industry. This wiki post provides the meaning of the most common abbreviations found on the QO/QOB product line.

QO and QOB

These letters refer to the way in which the miniature circuit breaker is mounted on the panel.

QO = Plug-in (snaps in place, no bolted connection to the distribution board)

QOB = Bolt-on (Note the bolts attached to the breaker)

Some characteristics are shared by all breakers in the QO/QOB product line:

Thermal-magnetic protection = Works against both overload and fault currents, calibrated for an ambient temperature of 40°C.

Equipped with a visual trip indicator = QO/QOB circuit breakers have a small window where a red indicator appears when the unit has tripped. The handle remains in the central position between on and off.

Where can QO circuit breakers be used?

QO load centers

NQ & NQOD panelboards

OEM mounting bases

Speed-D® switchboard distribution panels

Where can QOB circuit breakers be used?

NQO & NQOD panelboards

Numerical Code

After the QO/QOB marking, Square D circuit breakers have a numerical code such as “115”, “230” and “3100”. Interpreting it is very simple:

The first number indicates the number of poles.

The following two or three digits indicate the current rating.

The three examples mentioned above would indicate:

115 = 1-pole, 15 Amps

230 = 2-pole, 30 Amps

3100 = 3-pole, 100 Amps

Additional Letter Codes – Special Applications

QO and QOB circuit breakers may have additional letter codes, which indicate the following special applications:

QO-HM / QOB-HM

High Magnetic – Designed for lighting applications with a high inrush current. Only available in 15A and 20A ratings.

QO-HID / QOB-HID

High Intensity Discharge – For use with HID lighting fixtures such as metal halide, high pressure sodium and mercury vapor. Similar to HM, but designed specifically for HID lighting applications.

QO / QOB Miniature Switch

Miniature Switch – No thermal-magnetic protection, exclusively for manual disconnection.

QOK / QOBK

Key-Operated – Manual operation is accomplished through a key instead of a handle. Only available in 10A to 30A ratings, 1-pole, 120 VAC, 10 kA.

QO-GFI / QOB-GFI Qwik-Gard ®

Ground-Fault Interrupter – Designed to offer ground-fault protection for humans, trips with any ground-fault current of 6mA or more.

QO-EPD / QOB-EPD

Equipment Protection Device – Designed to offer ground-fault protection for equipment, trips with ground-fault currents of 30 mA or more.

QO-SWN / QOB-SWN

Switch Neutral Circuit Breaker – Disconnects both grounded and ungrounded conductors in applications that require it, such as gas pump assemblies.

QOT

Tandem Circuit Breaker – Two separate circuit breakers occupy the same pole space. They are designed for loads that are light and non-continuous.

QO-PL / QOB-PL Powerlink ®

Remotely Operated – Can be switched remotely by control devices such as push buttons and PLCs.

QO-AFI / QOB-AFI

Arc-Fault Interrupter, Branch Feeder Type – Can detect an arc-fault in the branch circuit being protected, and trips accordingly.

QO-CAFI / QOB-CAFI

Arc-Fault Interrupter, Combination Type – Same as above, but also includes arc-fault protection for cord sets and power-supply cords.

The Home Inspection

What To Do Before During And After A Home Inspection

You’ve made an offer on a home and it’s been accepted, so now what? There’s probably an ample amount of time before closing, and that’s no mistake. You need to use all of that time making sure the home you made an offer on is the one you want to buy. One of the ways you can do that is by getting a home inspection. Read through this article to understand better about what a home inspection is and what to do before, during, and after a home inspection.

What is a home inspection?

A home inspection occurs after you make an offer on a home and it’s accepted. You schedule a time with a qualified home inspector, who will go through the home’s systems, appliances and structure to look for problems, malfunctions and repairs that need to be made in the home

Generally, a home inspector looks at:

Plumbing

Electrical

Heating and air conditioning

Major appliances like your fridge, dishwasher, oven, washer, and dryer.

Structure of your home, including the foundation and windows

As the inspector goes through the home, they will turn on the systems and check to make sure they’re working correctly and don’t have any major red flags. After going through the entire home, the inspector will create an inspection report detailing the state that all of your systems and appliances are in.

How much does a home inspection cost?

A home inspection can cost between $300-$600, depending on the size of the home and the inspector’s rates.

How long will a home inspection take?

The length of time it takes a home inspector to go through the home depends on how large the home is, how thorough the inspector is, and the state of the property. If the home is smaller, it can take an hour to two hours. If the home is larger or more run down, the inspection can take up to six hours.

HOME INSPECTION SURVIVAL GUIDE

It’s like a scene from a reality television show. Strangers arrive at your front door and dive into every nook and cranny of your personal space. For hours on end they open closets, crawl through your belongings, turn on every faucet in the house, flush toilets, fire up your oven and run your dishwasher or any other appliance they can find. Then, they climb your roof, wander through your basement and seemingly trounce over every square inch of your yard. Your challenge, as the contestant in this show, is to remain pleasant, cheerful and completely accommodating while these personal invaders tear through your home.

It has been reported by National Association of Realtors (NAR), nearly four out of every five homes sold in the nation are evaluated by a professional home inspector before they are sold. Hired by the homebuyer, these inspections are designed to protect the buyers from investing in a home that turns out to be a real life money pit. NAR reports that realtors recommend buyers get a home inspection nearly 99% of the time. Most buyers heed that advice, requesting home inspections in 84% of all transactions.

How It Works

Nearly all purchase contracts for homes sold today include an inspection contingency clause, a provision to allow the buyers to hire a home inspector of their choosing to thoroughly evaluate the home for any major problems.

Once the contract has been signed, inspections usually happen quickly. After an appointment is made with the seller, the home inspector arrives with buyer in tow, and goes through the entire house. Typically, a home inspection will take two to three hours or more and include a check of the home’s structural and mechanical condition. But besides the structural and mechanical inspection, inspectors may also do tests for septic systems, water wells,  radon gas, check for wood destroying insects, or perform other services requested by the buyer.

According to TPREIA, a basic home inspection includes an evaluation of 10 different areas of the home: structure, exterior, roofing system, plumbing system, electrical system, heating system, air conditioning system, interior, insulation and ventilation, and fireplaces.

Here’s everything you need to know about home inspection checklist

Getting the keys and stepping into a newly completed home is always exciting for home buyers. That excitement comes with a tendency to think about things like where the furniture goes or who gets which room. However, a lot of people forget that as with anything you purchase, you need to check that the home does not have any defects. This should be the main priority as soon as vacant possession is delivered.

This is like a warranty period where any defects in the property will be rectified by the developer without any additional cost – and of course no hassle for you. We have put together a few tips and checklists to ease your house inspection journey and to ensure you are buying and up to code property that is worth

What is a home inspection?

A home inspection is a process of going through a new property to identify any defects or poor workmanship so that the developer can rectify it at no extra cost to the property owner. It is a process where you check your home thoroughly if there are any red flags. It could be the structure, utilities, grounds and rooms. It is also important to inspect the home from a safety standpoint to make sure it is hazard-free. Usually, homeowners will hire an expert to inspect the house. The inspector will then deliver a report of the major component of the home, its condition and whether it requires fixing

When should a home inspection be done?

A home inspection should be done once the buyer gets the keys to the property. Bear in mind that there will also be other owners submitting defect lists so there could be a waiting list for rectification works. To avoid disputes with the developer over who or what caused the defects, be sure to do the inspection and submit the defect list before you do any renovation or fitting works.

Who pays for a home inspection and how much does it cost?

The cost for a home inspection is borne by the homebuyer. As a buyer looking for defects in a new home, this makes sense as you would not want someone paid for by the developer to be doing this for you. The price of a professional inspector’s services depends on the size of the property assessed and the location.

Home Inspection: Find Out What an Inspector is Looking For

Whether you’re a buyer or a seller, the home inspection can make you sweat. Before you get too worked up, take a deep breath and realize that a home inspection isn’t a pass or fail thing. In fact, no home inspection will yield perfect results.

But some inspection reports are more concerning than others, and it’s important to know if an issue is a minor repair or a money pit. Here’s everything you need to know about home inspections!

What Is a Home Inspection?

Home inspections are a vital part of the home-buying process because they help the buyer avoid any surprises with the home they are purchasing. A home inspection includes an evaluation of structural elements, electrical features, plumbing, and heating and cooling systems.

A qualified home inspector will look for any health and safety problems, as well as any positive or negative property conditions. When the inspection is complete, the home inspector will provide a written, comprehensive report that details any issues with the home.

How Much Does a Home Inspection Cost?

The buyer pays for the home inspection. The cost can vary, but the U.S. Department of Housing and Urban Development estimates that it may cost a home buyer $300–500 for a home inspection. That may sound steep, but paying a few hundred dollars is worth it to avoid a costly surprise down the road!

The Keys to Performing a Proper Property Inspection

Buying a property is one of the biggest decisions most people will ever make, so you should make that the property you are going to buy has a sound structure, is pest-free and properly maintained. In order to do this, you will need to conduct a number of property inspections throughout the purchase process.

Personal inspection

An open-house viewing is the first chance you get to inspect a property. It offers a great opportunity for you to see the overall quality and features of a property. If possible, take someone else along with you, as that can person may be able to see potential issues and faults you may personally overlook.

What should you inspect?

To help you with your personal inspection, we have compiled a list of the things that you should check inside and outside the house you are buying.

Inside the house

Bedroom: How many bedrooms are there? How is their size? Are there built-in wardrobes?

Bathroom: Are there broken surfaces or damaged enamel? Cracked or lifting tiles and loose grout may be signs of water damage. Check if pipes have leaks, as well as if the toilet flushes properly and refills without an abnormal noise. Also make sure to check that the shower screen seal is correctly fitted.

Kitchen and laundry: Inquire about the age and quality of the benchtops and cupboards. Make sure there is room for all your appliances.

Taps: Check the colour and water pressure, as well as how well they drain.

Walls and ceilings: Are there cracks? If the damage is severe, repairs might cost thousands of dollars.

Doors and windows: Do the doors and windows open and close properly? If not, the frames may have warped (if they are wood) or rusted (if they are metal).

Flyscreens: Make sure they are fitted where necessary and are not damaged.

Floor coverings: Check the carpets for wear and tear and whether they need to be replaced. Lift rugs to make sure they are not covering any damage.

Furniture: Think about how your furnishings will fit with the property, whether you will need to replace them and what you may need to add.

Insulation: If you can look through the manhole into the roof, do so to check the age and condition of the insulation. In addition, ask if the walls are insulated.

Heating and cooling systems: Ask how old the units are, how well they perform and when they were last serviced.

Electrical wiring: If you find old-fashioned switches and sockets, check if they need to be replaced.

Power points: Check if they are all working, as well as if there are enough points in the right places and whether you will need to add more.

New paint: Paint is often used to hide faults, so run your hands over the walls and look at them from different angles to see if there are any problems. To see the paint job in a better light, consider inspecting the property on a bright sunny day, preferably during daytime or lunchtime.

Damp: Are there stains, water marks or paint damages? Use your sense of smell (as paint might have been used to hide damp).

Mould: Is there mould in the bathroom? If yes, it may be a sign that there is a ventilation problem to fix and that you will need to re-grout and repaint.

Pests: Look for signs of pest trouble (such as rats, mousetraps or poisons). Look particularly for signs of termite damage (such as sagging floors, springy floors and steps, and hollow-sounding beams)

Outside the house

Orientation: Which direction does the house face? It will give you an idea of the temperature of the living area.

General appearance: Check the overall state of the property. Look for damaged windows, cracks in the brickwork or cement work and whether repainting is needed.

Extensions: Check the quality of the workmanship on any extensions and look for the council approval.

External structures: Make sure carports, sheds, pergolas and decking are stable and in good condition.

Privacy: Is the property overlooked by neighbouring houses? If so, it can affect your enjoyment of your external spaces. Consider whether screens, fences or high-growing plants or trees will fix the problem.

Fencing: Do fences and gates need repairs? If so, find out your share of the cost.

Garden: Check its general condition. Are there sufficient taps for watering? Will its size and shape meet your needs? How much work will be required to maintain or improve it? In addition, check the age, condition and type of trees in it as well as whether any trees – including those owned by neighbours – have the potential to damage your property.

Roof: Are there missing, cracked or sliding tiles? A sagging roof may be a sign of underlying structural issues.

Gutters/downpipes: Look for leaks, rust, warps, holes and signs that the gutters overflow. If there are trees nearby, think about whether their leaves will cause problems. Check whether the downpipes are in order and fixed well to the stormwater drain.

Drainage: If patches in the garden are wet or muddy, it may be a sign of poor drainage. Look for any water damage on both the property itself and any surrounding structures.

Swimming pool/spa: Are there cracks or bulges in pool bottoms and sides? How are the lighting, filtration and heating systems? Check for evidence of leaks, repairs and maintenance, as well as the condition of the surrounding paving.

Fuse box: Is it modern? Does it meet safety requirements? If in doubt, get an electrician to check the box as well as the house wiring.

Asbestos: Were asbestos used? Where? (Most often, it can be found in walls, roofing and fencing.) Inhaling asbestos dust can cause serious health problems so, if there is any doubt, bring in a professional to do the assessment and removal.

Simple Guide To Becoming A Tax Preparation

Tax Preparation Services May Now Become Necessary

In today’s economy, self-employed people often have the greatest job security. The reward of entrepreneurship is independence, financial freedom and more. Imagine creating your own secure source of income–with unlimited potential! You can establish a great new home-based business that can be part-time or full-time… and even grow into a brick and mortar business. The choice is yours, and always will be when you’re a business owner.

Benefits of starting a tax business

  • Earn $100/hour or more as an experienced pro
  • Reduce your own tax liability
  • Your skills will make you more marketable
  • Work 3 months of the year and make a great income
  • Have your summers and holidays free
  • Be more secure – you control your own destiny
  • Start at home with minimal expenses

It’s easier and less expensive than you think!

  • Minimal start-up costs
  • Get your tax business started quickly
  • No franchise fees or royalties
  • No accounting background or degree required
  • We teach you everything you need to know and do it faster than you think!
  • No need to reinvent the wheel – we offer tax manuals on policies and procedures, tax preparation marketing, personnel and expansion

Huge growth potential

Millions of Americans pay a tax professional to prepare and file their tax return every year and Congress continues to make more changes to the tax code. These changes make taxpayers even more confused and frustrated and they are seeking out the help of Tax Professionals more than ever.

As the number of taxpayers continues to grow, so does the need for qualified Tax Professionals. And now, with the recent changes to the U.S. economy, it’s more important than ever for taxpayers to claim all of the credits and deductions due them and pay no more than the exact amount of taxes they owe. Starting your own tax business will enable you to meet this growing demand and also give you the flexibility and security you deserve.

The Gloomy Future of the Tax Preparation Industry

Undertakers and those in the funeral and burial business will always be able to rely on a steady stream of customers. And because taxes are, of course, the other inescapable element of life, income tax preparers have enjoyed a similar level of job security for the past several decades. But changes in the demographics of both those in the industry as well as their clientele have created an element of uncertainty regarding the future of this profession. Taxpayers now have more options than ever when it comes to filing their returns, and preparers have been forced to offer an ever-wider array of products and services in order to maintain their business.

A Changing Marketplace

In 2017 there were about 152 million individual returns filed in America.1 And despite all of the recent changes, taxpayers still have three basic avenues to choose from when they file. About half of filers went to a Certified Public Accountant (CPA) or a tax preparation franchise such as H&R Block or Jackson Hewitt to have their taxes prepared.2 Filers with complex returns, such as those who have business-related income or deductions from corporations, partnerships or oil and gas leases, or day traders who will require complicated basis calculations will continue to use trained professionals to prepare their returns. But the majority of filers with simpler returns are being presented with more and more options that make it possible for them to accomplish this task on their own. Of course, these software programs have been available for years to allow even those with moderately difficult returns, such as someone who runs a side business out of his or her home and itemizes deductions, to file their returns electronically.

The Digital Age

The tax preparation process itself has steadily become faster and more efficient as more and more information is now available in digital format. A growing number of preparers can now import much or all of their client data from personal finance websites, such as Mint.com or bookkeeping programs such as Quicken, directly onto their tax returns with a single click instead of entering all of those numbers manually. And electronic signatures that are entered with the client’s verbal permission often make it unnecessary for clients to physically appear in the preparer’s office. Mobile apps now allow taxpayers who file short forms to bypass computer preparation altogether.

Value-Added Services

Smart tax preparers know that preparing a client’s tax return is also an extremely effective form of prospecting for other types of business. One of the key reasons for this is that most clients do not view their preparers as salespersons but rather as professionals or advisors. This strategic advantage allows those with the proper training, licensure, and experience to quickly ascertain a client’s overall financial situation and offer insurance or investment products, or other services that may be needed, such as auditing, bookkeeping or even comprehensive financial plans. The additional revenue that can be generated from this approach can be substantial in many cases.

How to become a professional tax preparer:

1. Create your PTIN

Anyone who prepares tax returns and charges a fee for their services is required to have a Preparer Tax Identification Number (PTIN) . There aren’t any educational requirements to get your PTIN. You can create one online on the IRS website. The process only takes about 15 minutes. You can also apply for a PTIN by completing and mailing in  Form W-12. 

2. Apply for an EFIN

If you plan to file tax returns electronically, the IRS requires that you have an Electronic Filing Identification Number or EFIN . You can complete your application quickly on the IRS website, here. You will also need to provide your fingerprints to the IRS unless you are already a certified licensed professional, like a CPA or attorney. It should take about 45 days to get your EFIN.

3. Register with your state

Every state is different. Depending on where you plan to work, you may or may not need to register as a tax preparer. Look up your state’s requirements before you begin accepting clients.

4. Work at an office

When you are just starting out as a tax preparer, you may find it helpful to work for an established tax prep service for a brief period. Not only will you be able to ask questions and gain experience during tax season, but you could also learn valuable lessons about the state and local requirements where you plan to start your business.

5. Choose a tax prep software

Every tax preparer is different. Depending on your level of experience in the industry, you may require certain things from your tax preparation software. Consider your needs first. 

  • How much support and tax filing assistance is included?
  • Can you install the software on your desktop?
  • Does it come in a cloud-based version?
  • Can your provider also help you grow your revenue as you gain experience?

Market yourself

While there many ways to market your new practice, here are a few common ways that tax pros get the word out about their practices so that you can start to develop a plan around marketing your own practice:

  • Build a website: A website is a must-have for a business today. Use your website to tell your potential customers about you and your business model, and to list contact information. Our tax pros have found that it’s important to include your picture on the website, and that understanding SEO is also a key factor in success. Some of our other recommended marketing tactics below will cover additional ways to build out your website.
  • Connect on social media: Social media can help you connect with potential clients and others in the industry, and develop a brand that represents your practice. Twitter, Facebook and LinkedIn are all great platforms to establish a social presence and connect with clients, peers and others in the industry, and some tax pros link to their social channels on their websites. With a large and growing number of social groups and communities online, finding trusted and useful online communities to turn to for networking, information and help can sometimes be a challenge, so read our article on “5 Online and Social Communities for Tax Professionals” to get our recommendation on where to start.
  • Network: In-person networking is important to growing your business as well. Many states and some cities offer local tax and accounting associations. A few national associations such as the National Association of Tax Professionals (NATP) have local chapters, and major accounting organizations like the AICPA and the National Association of Enrolled Agents (NAEA) have national conferences every year to help you network with industry experts and earn continuing education credits. Don’t forget your business cards at home! Read our article on “5 Reasons you Should Join a Professional Association” to learn about more of the benefits.
  • Use content marketing: From testimonials and case studies to articles that showcase your expertise, content marketing can be a way to stand out in the industry. You can host content marketing on your own site and share it via your social media channels to spread the word. Get lessons from a pro about how to use content marketing to grow your practice.
  • Use direct marketing: Flyers, brochures and emails can be helpful vehicles as you spread the word about your services. Some tax professionals include discounts and other incentives in their collateral. Consider advertising your services using bulletins distributed by community centers, churches, and grocery stores.
  • Ask existing clients for referrals: Word of mouth is important to many clients who are looking for a tax pro, so don’t be afraid to ask your current clients for referrals. You may also consider rewarding clients for referrals with discounts or other incentives. If you don’t have any clients yet, set up referral program with your friends and family. Let them know now you are starting tax business — you can help them with theirs if they can refer some friends to you. Get tips on how to ask for referrals.
  • Partnerships: Partner with other professionals who offer services that compliment, but don’t compete, with yours. For example, you may be able to partner with an insurance agent, offering services to his or her customers while referring the agent to your clients who are looking for additional coverage.

Services you can add to increase your revenue as a tax preparer

As a tax preparer, a lot of your income for the year is earned in just a few months. Naturally, you’ll want to maximize your revenue during that time. And, depending on your financial goals and needs, you may want to supplement with other services that you can do year-round. Here are some ways that you can continue to serve your customers and use your expertise to earn more money in and outside of tax season.

1. Offer bank products

Bank products are sometimes called “settlement solutions” or “refund transfers.” Bank products allow you to deduct your tax prep fee from the client’s tax refund, which means you can offer your services at ‘no out-of-pocket cost’ to your clients. You can even help them receive a portion of their refund right away, instead of waiting for the IRS to send the money. 

2. Become a service bureau

This is one opportunity that is especially interesting once you’ve established yourself in the tax prep business. As a service bureau, you can diversify your revenue by reselling tax software that you trust using your own label/brand. You help other tax preparers grow their business, and as a result, your business grows, too. 

3. Become an enrolled agent

This is one career move you can make that will set your tax business apart from the others. The enrolled agent status is the highest credential awarded by the IRS, but not everyone tries or succeeds in earning the title. To become an EA, you must meet a set of requirements that includes taking exams, passing a suitability check, and continuing your tax education. 

4. Offer bookkeeping 

If you are already preparing taxes for a business, it may be natural to offer bookkeeping as an additional service. Bookkeeping includes keeping track of an entity’s financial statements, transactions, expenditures, and income. As a tax preparer, chances are you already possess many of the skills needed to be a successful bookkeeper. 

You need a high school degree to offer bookkeeping as a service. You can be certified or obtain a license if you choose, but it is not required. Still, having a license may help to attract more business, and the coursework could be beneficial in the long run.  

5. Manage Payroll

Running payroll for a client business is another service that doesn’t require a specialized degree. There are a number of payroll software solutions that are designed to make payroll simple and accessible. 

For many small business owners, hiring someone to manage payroll tasks is a worthwhile expense because they have more time to focus on earning and increasing revenue. For you, it can mean ensuring that your client is in compliance with the laws and their employer tax info is being properly tracked.

Eye Care Is More Than A Visit To The Doctor

Thyroid Eye Disease (TED or Graves Eye Disease)

What Is Graves’ Eye Disease or Thyroid Eye Disease?

Graves’ eye disease, also known as thyroid eye disease, is an autoimmune condition in which immune cells attack the thyroid gland which responds by secreting an excess amount of thyroid hormone. As a result, the thyroid gland enlarges and excess hormones increase metabolism. The hypermetabolic state is characterized by fast pulse/heartbeat, palpitations, profuse sweating, high blood pressure, irritability, fatigue, weight loss, heat intolerance, and loss of hair and alterations in hair quality. When the immune system attacks the tissues around the eyes, it causes the eye muscles or fat to expand.

The eyes are particularly vulnerable to Graves’ eye disease, because the autoimmune attack often targets the eye muscles and connective tissue within the eye socket. This likely occurs because these tissues contain proteins that appear similar to the immune system as those of the thyroid gland. Ocular symptoms can range from mild to severe; but only 10-20% of patients have sight threatening disease. Another tissue that can also be involved in the immune attack of Graves’ eye disease is the skin of the shins.

Signs and Symptoms of Graves’ Eye Disease

In Graves’ eye disease the tissue around the eye is attacked, and the result is inflammation and swelling, causing:

  • Redness and pain
  • Puffiness around the eyes
  • Bulging of the eyes
  • Dry eye and irritation, occurring when the eyelids cannot close completely over bulging eyes

Progressive swelling may cause:

  • Increased pressure inside the eye socket
  • Pressure-pain or deep headache, which worsens with eye movements
  • Decreased vision, when swollen tissues push on the optic nerve

The muscles around the eye are particularly susceptible to the attack of lymphocytes. As they tighten and lose their ability to stretch, these symptoms can occur:

  • The eye is pushed forward in its socket causing a “staring” appearance
  • Restriction of the eye’s normal movements, resulting in double vision

As symptoms build, many patients fear they will lose their vision. Fortunately, patients almost never go blind from Graves’ eye disease.

Problems associated with thyroid eye disease

Dry irritated eyes

TED may cause you to experience dry, irritated and often teary eyes. This is usually due to the eyelids retracting and or protruding. When the eyelids do not close completely at night, the cornea (clear front portion of the eye) dries out and becomes quite uncomfortable. The use of lubricating ointment for the eye at night and artificial tears during the day can provide a great deal of relief. Do not be afraid to use the tears frequently, as much as every 1/2 to 1 hour if necessary.

Double vision

TED can cause swelling, irritation and scarring of the muscles that move the eyes. This can lead to double vision. Double vision may not be present all the time, sometimes it is noticeable only when looking in certain directions, while in other patients it is always present. Often the amount of double vision will change week to week. At times it can disappear completely without treatment. Once the double vision has been stable for at least several months, surgery can be performed to correct it if necessary. Dr. Dailey will refer you to a referring provider for the surgery.

Eyelid retraction

TED can cause scarring in the eyelid muscles. This scar tissue contracts or shortens, causing the eyelid to retract and increasing the white showing above and below the colored part of the eye. The amount of retraction tends to be variable, often changing week to week. In some patients the retraction will disappear with time. In addition to contributing to an unusual appearance of the eyes, the eyelid retraction can cause significant dryness, irritation and tearing. Light sensitivity is another common complaint. Severe drying of the front of the eye can occasionally lead to vision loss.

It is usually preferred to wait for the eyelid position to stop changing before proceeding with surgery. Surgery involves moving the eyelids into a more normal position. In the upper eyelids this is usually performed by removing or stretching the scarred muscles. In the lower eyelids, a graft is often needed to help push the eyelid upward. Eyelid repositioning can make a tremendous difference in both the feel and appearance of the eyes.

Eye protrusion

TED can cause an accumulation of fluid in the fat and muscles around and behind the eye. This can push the eye itself outward making it much more prominent. Coupled with eyelid retraction this can alter the appearance and comfort of the eye. Although less variable than eyelid retraction, the protrusion of the eye can return to normal on its own. After being stable for several months or more, it is sometimes desirable to surgically move the eye into a more normal position. This can be accomplished by removing a portion of the bones surrounding the eye. The swollen fat and muscles around the eye can then fall into the extra space, allowing the eye to move backward. This can go a long way toward returning the eyes to their pre-thyroid appearance and relieve the relentless pressure and irritation most patients feel around their eyes.

Common Eye Problems

The following common eye problems can be easily treated. But, sometimes they can be signs of more serious issues.

  • Presbyopia (prez-bee-OH-pee-uh) is a slow loss of ability to see close objects or small print. It is normal to have this problem as you get older. People with presbyopia often have headaches or strained, tired eyes. Reading glasses usually fix the problem.
  • Floaters are tiny specks or “cobwebs” that seem to float across your vision. You might see them in well-lit rooms or outdoors on a bright day. Floaters can be a normal part of aging. But, sometimes they are a sign of a more serious eye problem, such as retinal detachment. If you see many new floaters and/or flashes of light, see your eye care professional right away.
  • Tearing (or having too many tears) can come from being sensitive to light, wind, or temperature changes, or having a condition called dry eye. Wearing sunglasses may help. So might eye drops. Sometimes tearing is a sign of a more serious eye problem, like an infection or a blocked tear duct. Your eye care professional can treat these problems.
  • Eyelid problems can result from different diseases or conditions. Common eyelid problems include red and swollen eyelids, itching, tearing, and crusting of eyelashes during sleep. These problems may be caused by a condition called blepharitis (ble-fa-RI-tis) and treated with warm compresses and gentle eyelid scrubs.

Common Eye Conditions

Nearsightedness – This is also known as myopia. A person can see objects clearly when they are close to them, but objects at a distance will appear blurred. Nearsightedness affects about 30% of the population and is easily treated with contacts or glasses.

Farsightedness – This is also known as hyperopia and is the opposite of nearsightedness. A person can see objects clearly that are far away, but objects close to them are blurry. This is also easily treatable just like myopia.

Astigmatism – The surface of the cornea or lens is not spherical, causing your eyes to focus at two separate points instead of one. This can cause eye strain, discomfort, headaches, blurred/distorted eyesight, night vision problems and more. We can easily treat astigmatism with proper contacts or eyewear.

Macular Degeneration – This is a deterioration of the center part of your retina or the area in the back of the eye that receives the images and sends information to the brain. A person will start to see a gray/black dot in the center of their eyesight which will gradually grow larger. This condition is the leading cause of vision loss and is incurable, however, the effects can be slowed with treatment.

Cataracts – The clouding of the lens in your eye that can affect only one eye or both eyes. The lens sits behind the colored part of your eye (the iris) and will cloud over, causing light to scatter and blur. You may also see a double vision with objects. This condition generally is caused by age or injury but sometimes can be caused by genetics, past eye conditions, surgeries, chronic illnesses, and medications.

Glaucoma – Condition where the optic nerve of the eye is affected. The optic nerve carries images from the retina to the brain. Glaucoma often has no noticeable symptoms and is not painful. You will gradually lose your peripheral vision though, and that loss will continue. With frequent eye exams, we can detect glaucoma and greatly slow down the progress of the disease.

Tips for Healthy Eyes

  • Protect your eyes from too much sunlight by wearing sunglasses that block ultraviolet (UV) radiation and a hat with a wide brim when you are outside.
  • Stop smoking.
  • Make smart food choices.
  • Be physically active and maintain a healthy weight.
  • Maintain normal blood pressure.
  • Control diabetes (if you have it).
  • If you spend a lot of time at the computer or focused on one thing, you can forget to blink. Every 20 minutes, look away about 20 feet for 20 seconds to prevent eye strain.

Pet Snake Tips

Snakes: Information

Few animals are more disliked or misunderstood than snakes. Irrational fears and feelings that people have about snakes come from misunderstandings and superstitions handed down from one generation to another. Snakes are not mysterious at all, and their colorful, fascinating life histories do not justify the anxiety many people feel about them

Most of the 50 species and subspecies of snakes found are harmless. (A subspecies is a geographic race of a species.) The five species of venomous snakes found in the state include the Osage copperhead, western cottonmouth (water moccasin), western pygmy rattlesnake, massasauga rattlesnake and timber rattlesnake. Although you should respect venomous snakes and approach them with caution, most snakes you may encounter in an urban environment are harmless and beneficial because they eat insects, mice and other rodents.

Snake biology and habits

Snakes are reptiles — a group that also includes lizards, alligators and turtles. Reptiles have been around for millions of years. Snakes are ectotherms, which means they regulate their body temperature by taking heat from their environment or by giving off heat. Because their body temperature is affected by environmental temperatures and varies with surrounding conditions, snakes are inactive during hot seasons (aestivation) and cold seasons (hibernation). Snakes may go for several weeks without eating because of frequent periods of inactivity.

Because snakes are coldblooded, they must rely on behavior to regulate their body temperature. During the hot part of the day, snakes move to shaded areas. On cool days, they sun themselves on rocks or in warm and open areas. Snakes often seek out paved roads because they are attracted by the heat from the road surface.

Because snakes have a backbone, they are classified as vertebrates, the same group as fish, mammals, birds and humans. The snake’s skeletal system is unique. Snake bones are light and highly movable. The lower jaws and skull are connected by a piece of stretchy material called a ligament. This ligament allows the snake to open its mouth wide and move each jaw independently. Thus, a snake can swallow prey much larger than its head.

Don’t wait to see a snake

Use Snake Deterrents to create an avoidance zone

Snake Deterrents have been developed to repel many kinds of snakes. They emit a pulsing vibration into the surrounding soil. When the snake perceives the vibration as a source of danger most snakes will choose to avoid confrontation. (Similar principle to bush walkers walking noisily to scare snakes away.)

Snake Facts:

Scientists have evidence that snakes can detect the direction of vibration!

Vibrations as small as one billionth of a meter can be sensed by some snakes!

Snakes hardly hear airborne sounds but are sensitive to vibration.

Most snakes choose to avoid danger.

Snake Deterrents:

Vibrate to signal danger.

Vibrate within the snakes pitch range.

There are a number of factors to consider:

To protect one spot, one snake repellent may be sufficient. To protect the area immediately around your house, one repellent at each corner could be enough to provide overlapping vibration between adjacent repellents. Best coverage is when the snake repellents are away from the walls, say 5m.

Some situations may require more repellents.

Soil types: The 25m apart is a maximum range for most soils, but for sandy soil or soil with a lot of fine stones, you should reduce this to 10m apart.

Hard objects: If you have pathways, you’ll need a repellent on both side because the vibration doesn’t pass through hard objects in the ground. This applies to concrete, bitumen, gravel, pavers, etc.

Shallow top soil: If your top soil is shallow then reduce the separation between repellents.

Multi-level ground: You’ll need snake repellents on both levels where ground is terraced because the vibration won’t travel between levels.

Soil cracks: If the soil is dry and cracked you’ll need repellents on both side because the vibration doesn’t cross the gap

Ways to Stop Snakes From Slithering Into Your Yard

With a drier and hotter start to summer this year, more snakes are following their prey into areas that are irrigated and provide good cover and food. Unfortunately, this describes many people’s yards, and for a lot of people, the sight of a snake strikes fear. To further the problem, many companies take advantage of people’s fear of snakes by selling products or services that are ineffective, and in some cases, may increase the danger to people and pets

Most people’s fear of snakes stems from the worry that they are venomous. Most won’t want to be close enough to tell, but venomous snakes have a pupil that resembles a cat’s. It has an oblong shape with peaked ends that look like a slit in the center of the eye. Non-venomous snakes usually have round pupils. The snakes most people are likely to see in their yards will be non-venomous, such as the garter or gopher snake.

If you encounter a snake in or around your home, keep calm and follow these tips.

Mow grass often and keep it fairly short. Snakes are less likely to reside and move through short grass because it increases their exposure to predators such as owls and  hawks. Shorter grass also makes snakes easier to spot.

Avoid over watering your lawn. Too much landscape water may attract prey species such as worms, slugs and frogs, which in turn may attract snakes seeking a meal.

Keep trees and shrubs trimmed and away from your home and garage, and keep branches off the ground. Creating a 24-to-36-inch space under trees and shrubs will help keep snakes away and will make it easier to spot them if they do slither in.

If you feed birds, keep the feeder away from the house or consider not feeding them. Birds are messy eaters and often leave seed scattered below the feeder. Seed on the ground attracts rodents, which may also attract snakes seeking a meal. Store bird seed in a metal can with a tight-fitting lid.

Feed pets inside. Feeding them outside can attract insects and rodents which, again,  attract snakes. If feeding outside is necessary, be sure to clean up uneaten food promptly. Store pet food in a metal can with a tight-fitting lid.

Store firewood, excess lumber and other types of debris away from your home. These provide prefect places for snakes to hide.

Think before you landscape. Avoid using mulch and large rocks in your landscape, as they attract snakes and their prey and can create breeding and overwintering habitat. Instead, use smaller, tight-fitting rock such as gravel or river rock. Also avoid landscaping with water gardens and Koi ponds.

Seal cracks and crevices on sidewalks and foundations, and consider getting an energy audit. These can be a great way to identify places that allow air conditioning and heat to escape the home. These same cracks and crevices may be used as an entry point by snakes and other small creatures.

When all else fails, consider fencing. Use 1/4 inch or smaller rigid mesh or solid sheeting and bury it a few inches into the ground. Include a bend at the top to prevent snakes from climbing up and over.

Do not use snake repellents or sulfur, as they are ineffective. Do not use mothballs because the active ingredient is naphthalene or paradichlorobenzene – chemicals that are toxic to insects and mammals, but are not effective against snakes. Using mothballs outside your home also violates product labels and puts your family and pets at risk. Do not use sticky traps outside. Traps placed outside capture all sorts of non-target animals and result in a slow, agonizing death.

If you have issues with snakes in your chicken coop, avoid using ceramic eggs or golf balls. Snakes that eat these artificial eggs die a slow and painful death over many weeks, and new snakes will show up to take their place. Instead, focus on improving your coop to prevent snakes from entering and follow the deterrents recommended above. If using ceramic or other artificial eggs to encourage a brooding hen to lay, glue them down to prevent snakes from eating them.

Do not bring out the guns, shovels or other weapons. Discharging a firearm toward the ground can result in bullet ricochet. If needing to get a snake to move on, use a water hose to spray the snake, which will encourage it to find a new place to take up residence.

Snakes

ADAPTATIONS

Snakes belong to the reptile family along with turtles, lizards, crocodiles, and alligators. Reptile young are hatched from shelled eggs or born alive and are essentially miniature versions of their parents. Reptiles depend on the outside environment for body heat because they do not produce it internally.

Snakes do not have eyelids! Their eyes are covered by a protective transparent scale.

Snakes hear by picking up vibrations through their skull and jaw bones.

Snakes smell with their tongue! Odor particles are picked up by the tongue and deposited on a special organ in the roof of the snake’s mouth which then sends information to the brain. This sense of smell assists the snake in finding food and identifying potential mates or enemies.

A snake’s dry and scaly skin provides protection as they move over rough or prickly terrain.

The outer skin covering is shed and replaced several times during the year and shed skins are good clues to the presence of secretive snakes.

Snakes are predators. The smaller Michigan snakes feed on invertebrates such as worms, slugs, or insects. The larger species take larger prey, such as frogs, rodents, birds, or other reptiles.

Snakes must swallow their food whole. This is possible due to flexible connections between many of their skull and jaw bones and stretchable skin, which allows them to swallow prey larger than their heads.

Non-venomous snakes have tiny, recurved teeth that are useful for holding and swallowing prey.

Venomous species have these same recurved teeth, as well as enlarged teeth for injecting venom.

REPRODUCTION

Snakes usually mate in early spring. Although the majority of reptiles reproduce by laying shelled eggs, many snakes give birth to babies that develop inside the mother’s body. Of 18 snake species, 10 are live-bearing and only 8 lay eggs.

Egg-laying usually occurs in early summer, with the eggs deposited in an empty rodent burrow, in moist sand or soil, or under a log or stump.

Depending on the snake species, clutch size ranges from 1 to 50 eggs.

Most snakes abandon their nests soon after the eggs are laid, but females sometimes coil about the eggs for varying time periods.

Hatching occurs in late summer or fall when the baby snakes cut their way through the leathery egg shell using a specialized “egg-tooth.”

Live-bearing snakes give birth about the same time in late summer

The number of young born can vary from 5 to 50 depending on the species.

The babies often emerge enclosed in a thin membrane which soon ruptures.

There is no parental care of the young, though they may remain near the female for several hours.

SNAKES AND PEOPLE

17 of 18 snake species are harmless, and the one venomous rattlesnake can be identified with minimal training. All snakes can be avoided with simple precautions when visiting natural areas. Learn more about snake safety tips and snake bite treatment

Snakebite

Key Points

Specific advice about children with potential snakebite should be sought early from a clinical toxicologist (Poisons Information Centre 13 11 26, 24 hrs/day).  This should particularly occur with envenomation by snakes of snake-handlers or other sources of exotic snakes, as well as by those bitten by snakes in locations other than.

In Victoria, there are 3 venomous snakes – Brown, Tiger and Red-Bellied Black.

Antivenom should be administered early if signs of envenomation.  Brown and tiger antivenom will cover all snakes.

Background

Snake bite is uncommon and envenomation (systemic poisoning from the bite) is rare. The bite site may be evidenced by fang marks, one or multiple scratches. The bite site may be painful, swollen or bruised, but usually is not for snakes

Assessment

Focus on evidence of envenomation.

Once the possibility of snakebite has been raised, it is important to determine whether a child has been envenomed to establish the need for antivenom.

This is usually done taking into consideration the combination of circumstances, symptoms, examination and laboratory test results.

Most people bitten by snakes do not become significantly envenomed.

Role of snake venom detection kit (VDK)

A VDK is rarely indicated as

There are only two types of antivenom required for snakes (tiger and brown) and both can be given to treat envenomation without identifying the snake, and

The diagnosis of envenomation is based on the aforementioned history, examination and laboratory test findings.  A VDK is NOT used to diagnose envenomation.

A VDK may be indicated if the snakebite is from a non-snake.

Attempted identification of snakes by witnesses should never be relied upon as snakes of different species may have the same colouring or banding.

VDKs can have significant rates of snake misidentification with both false positives and false negatives and should therefore only be performed by an experienced laboratory technician.

The results should not override clinical and geographical data. Discuss use and results with a clinical toxicologist

How To Choose The Right Type Of Truck Tires For Your Truck

Important Things To Know About Commercial Truck tires!

Among the essential asset of a truck are the tires. The function of tires is to connect the truck and trailers to the road. Often it isn’t very easy to understand the importance of truck tires. Tires help the drivers to steer on the terrains, which can be diverse safely. It won’t be wrong if we say that the tires play an essential part in the working and driving a vehicle.

To purchase the right type of tire is essential to benefit your commercial truck for all purposes. You might need the right quality tires for your commercial trucks or regular vehicles. It can create a big difference in how the rig runs and save your time and money both. That is why it is advised to the trucks’ users to take more care of their truck’s tires.

When we talk about purchasing tires, the first thing to focus on is getting the right quality tire even if you need to pay more for that. Getting an inexpensive one, or you can say, getting a low-quality tire will always create a hurdle for you. It is essential to always go for a high-quality truck tire to get future benefits.

Here are few reasons why you must get a high-quality commercial truck tire:

Save time and money: by getting the right kind of tire, you may save money and precious time. Although you need to pay more at first, you will realize that this helped save a lot of money and time both in the long run. You might see that the good ones are tough through ten and also 1000’s of miles. It merely explains that there is no need to add more money to the quality of the tire. Another advantage you will find will be to save on the hassle of getting new ones frequently.

Getting cheap quality tires might waste your time. It might also get on your nerves and for the commercial trucks especially.  As there is a lot of load carried on the commercial trucks, by fitting weak quality tires, it may create problems, and you will soon realize that the truck’s tires last longer. The situation will then become uncontrollable. By getting the right quality tires will help you save your time, energy, and money. It is much better to get the right quality tire as it will help to get an excellent rolling resistance. The fuel consumption will also be less as the trucks glide smoothly, and there is no need for acceleration.

Taking good care of your commercial truck tires will help decrease the truck’s running cost as it costs a lot of money. Here are some of the measures that one needs to consider and take care of and follow.

Keep the tires inflated: you are advised to check the tires’ inflation and check the air in them. It must be inflated so that the tire stays smooth, and it won’t create any hurdle. You also need to check the air that how much it is inflated while at the same time filling up the gas to check that it remains complete.

Inspecting the commercial truck tires regularly:

It would help if you inspected the tires of your truck regularly. Check for wear and tear. They often get less efficient at the time of treads to wear out, resulting in more cost. You need to purchase fuel, which makes the traction low and might lower the tires’ life.

MONEY-SAVING TIPS:

1. Don’t think that you can save money by replacing only one tire in a pair of drive or trailer tires. The new tire with deeper tread will most likely wear down prematurely, causing you to have to replace it more quickly. Even though it is more expensive to replace both simultaneously, especially when they are close to needing to be replaced anyway, they will wear at the same rate.

2. Many truck drivers do a visual inspection of the depth of their tire tread when they check their tires with a “tire thumper.” This may not be adequate, depending on your company’s requirements. If you are an owner-operator, measuring the depth may be more important to you because you’re paying for the tires.

3. Watch for other problems associated with uneven wear on a tire tread, which may be an indication of a problem. For example, a tire that wears more on one side than another may be a sign that your truck has an alignment problem. Replacing the tire in this case will not solve the problem. The truck must first be realigned.

4. Experts recommend that you measure tread depth at least once a week.

How to extend the life of commercial truck tires

Commercial truck tires represent a significant cost in truck driving. Extending the lifespan of your tires can help you save money and can keep you and everyone around you safer on the road. Most of what you need to do to keep your commercial tires in good shape is staying on top of regular maintenance. Get in the habit of doing the following:

Buy High-Quality Commercial Truck Tires

The first step you should take is to buy high-quality commercial truck tires that are built to last through extensive testing to ensure durability. Buying cheap tires may seem like a good idea to save you money up front, but it will end up costing you money over time. High-quality tires last longer and reduce the amount of maintenance they need.

Carefully Monitor Inflation

Improper tire inflation can lead to a host of problems, including increased wear, irregular wear, and blowouts. In the worst case scenario, poorly inflated tires can be a serious safety hazard. In the best case, it causes your tires to wear more quickly, meaning you’ll need to replace them sooner. Tires that are underinflated wear more quickly on the tire shoulders. Under inflation, in more extreme cases, can also weaken the tire sidewalls and ultimately lead to a structural failure. This is when ruptures and tread separations can happen. On the opposite end of the spectrum, over inflation is also a problem. An overinflated tire will wear more quickly in the middle and is also more likely to cause a blowout. Both kinds of improper inflation cause your tires to wear quickly in some areas. To prevent this problem, it’s essential to conduct regular tire inspections. Keep in mind that even if you adjusted your tires to the right PSI, they will lose pressure gradually over time, and more quickly in cold weather.

Rotate Commercial Tires Regularly

Your tires wear differently depending on where they are located. Front tires wear more quickly on the shoulders, and rear tires generally wear more quickly in the middle. Overall, rear tires wear a little more quickly. Rotating your tires regularly helps to equalize this wear and keep all of your tires in good condition for longer. Ideally, you’ll be able to line up your tire rotations with other necessary service. You should, however, rotate your tires every 6,000 to 8,000 miles, even if your truck isn’t due in for other service. The inconvenience will be worth it for increased ride comfort and better tire longevity.

Visually Inspect Commercial Tires

The last thing you can do to help is regularly inspect your tires. It’s a good idea to make a visual inspect part of your pre-trip routine. Look over your tires to check for bulges, cuts, or irregularities in the tread wear. Irregularities may mean that your tires are wearing unevenly due to misalignment or improper inflation. A quick visual check can tip you off that a problem is emerging, enabling you to adjust your tires before the problem becomes serious.

Will Lifting My Truck Change the Ride?

If you’re looking to lift your truck, you might be wondering whether a lift will change how your truck rides. Truck lift kits are great for adding more ground clearance, and they give you space for larger tires. Depending on the make and model of your truck and which lift kit you choose, these modifications could change the way it feels to drive your truck, resulting in stability and handling issues. Luckily, most of these issues can be fixed with some additional modifications. Learn more about how lifting can change the ride of your truck and what you can do to fix it.

Stability and a New Center of Gravity

When you lift your truck, whether it’s by two inches or twelve, you’ll change the truck’s center of gravity. Your truck will sit higher off the ground, so the center of gravity will be slightly higher as well. This means your truck may not be as stable once the lift kit has been installed. If you take a fast turn or reach top speeds on the highway, you might notice the truck doesn’t handle the way it used to when you were sitting closer to the earth.

Adding larger and wider tires can help you solve this issue. You’ll have more contact with the road, so your truck won’t feel as unstable, but your truck’s center of gravity will be altered, regardless, so it’s usually best to adjust your driving habits accordingly. If your truck’s lift is more than a few inches, take turns slowly and refrain from accelerating too quickly.

Suspension Fatigue and Damping

Lifting your truck can also lead to some suspension problems. You might notice less suspension damping during long trips and on rough, uneven roads, but this only tends to be an issue if you’re lifting your truck more than a few inches. Over time, this lack of dampening can lead to more serious problems and even damage your truck’s suspension system.

To combat these issues, you can invest in reservoir shocks to help smooth out your ride. You can also consider buying coilover shocks, custom leaf springs, and traction bars for even more dampening relief.

Steering and Handling

If you love to go off-road, you might want to modify your truck’s steering system with off-road lugs to keep your steering components more secure, but this can lead to problems when you’re driving on paved roads, making it more difficult to steer and handle your truck in all kinds of situations. You might notice a wandering steering wheel and more resistance behind the wheel, or that your wheels are slow to react to the steering components. This usually means your steering system can’t handle the larger tires or your steering components are misaligned.

Check to see if the tie-rod is parallel to the axle and the traction bar and panhandle bar are parallel to each other. If not, you’ll need to get these components back in sync with each other or have a professional tinker with your steering system. Adding a hydraulic ram can also help you smooth out your lifted truck ride. You might also just have to get used to handling your truck a little differently than you’re used to.